


There are times when it can be tricky to create natural movement manually by setting keyframes in the standard manner. I realised that an under-used feature of After Effects could be perfect for what I needed to achieve.
You’ve probably found yourself in this situation at some point of pushing around keyframes trying to get that perfectly natural movement that feels organic and not mechanical. It can be a painstaking process to create that feeling of natural movement. I realised I could replicate the movement I was after waving my mouse cursor about, so wouldn’t it be nice if I could turn that mouse movement in to keyframes? As it happens, After Effects actually has a feature that does exactly that.
Motion Sketch
Motion Sketch is a panel within After Effects, which records the position of the layer and the speed at which you draw. As you draw, a Position keyframe is generated at each frame.
When you play the animation back, it will play at the speed you recorded it.
Let’s make something..
Let’s make a moustache flap about in the wind with the wind speed gradually building as it goes along.
I created a pre-rendered sequence of the moustache going from its resting position, to fully flapping. My plan was to animate this sequence using the Time Remap property. Here’s how the image sequence looks:
So let's have a look at creating a wind controller that will give our moustache some natural movement.
Step 1: Recording the motion
Create an object in your comp that will act as your wind source, this could be a null object or a small solid. Align it to 0 on the x-axis, this will be it’s starting point.
When you are ready, open the Motion Sketch panel, and click ‘Start Capture’. It will wait for you to interact with your wind source object. As soon as you click, it will start recording. Below is my wind motion that I recorded. It might take a few tries to get it moving the way you want it, but just keep re-recording until you get it the way you want it.
Step 2: Applying wind motion to moustache
We now have an animated object to act as our wind animation controller, but we need to link that movement to our moustache. We will use the x property of the object to control the timing of moustache pre-comp. The first thing we will do is to look at the maximum distance the wind object travels on the x-axis.
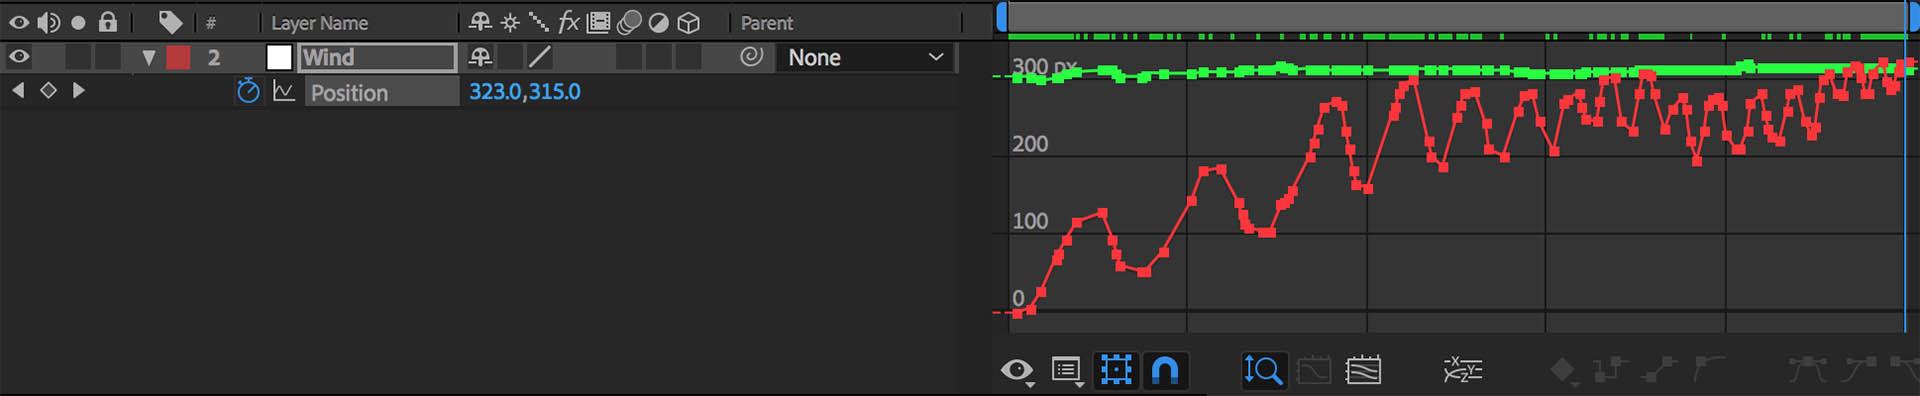
In graph mode we can see that when the objects’ x position is 323, this is the wind at full power - 100%.
So to link that number to the time remap property of the moustache comp, select time remap on the moustache comp, then hold the alt key and click on the stopwatch icon, which will open up the expression input field, and add the following expression:
thisComp.layer("Wind").transform.position[0];
This expression tells the time remap property to look at our wind controller and take the value of it’s x position. (Position[0] gets the x position, and position[1] gets the y position.)
However as our moustache pre-comp consists of only 50 frames, we will want to animate it between 0 and 50, not 0 and 323, so we will use a bit of maths to reduce the number of the wind controller so that the number it generates is between 0 and 50.
thisComp.layer("Wind").transform.position[0]/250;
Lets see how our moustache animation is looking now:
So now we have some natural movement going on - great! But it's possible (and pretty quick) to make it even more realistic, so let’s go one step further...
You’ll have noticed that both sides of the moustache are moving symmetrically, what would make it feel more realistic is if the two halves of the moustache curled at different times as the wind affects them.
First off we’ll duplicate the moustache comp and mask each half so that we have a left side and a right side.
Then we will duplicate the wind controller, and rename it to “wind ripple”
Now we won’t be using any keyframes on this one, so clear the position keyframes. Instead we will use an expression to make it follow the master wind controller.
delay = 2;
leader = thisComp.layer("Wind");
temp = leader.transform.position.valueAtTime(time - delay);
[temp[0], 125];
delay = 2;
In the first line we set a delay variable, this is how many seconds delay will be applied to the ‘child’ wind ripple comp.
leader = thisComp.layer("Wind");
The next line defines the layer in the comp that will act as the parent/leader.
temp = leader.transform.position.valueAtTime(time - delay);
This line creates a variable which contains the position coordinates of the leader layer’s at the current time minus the delay (ie 2 seconds before the current time).
[temp[0], 125];
Finally, the x position ([0]) is applied to the wind ripple comp.
If you scrub through your timeline now, you should see your wind ripple controller following the wind controller at a delay of 2 seconds.
Linking it up
We’ll link it up the same way we did before using this expression:
thisComp.layer("Wind Ripple_V2").transform.position[0]/480;
You might notice the number at the end is bigger, this will reduce the amount of movement of the right side of the tash, which is our final bit of detail to give it that nice feeling of natural motion.

